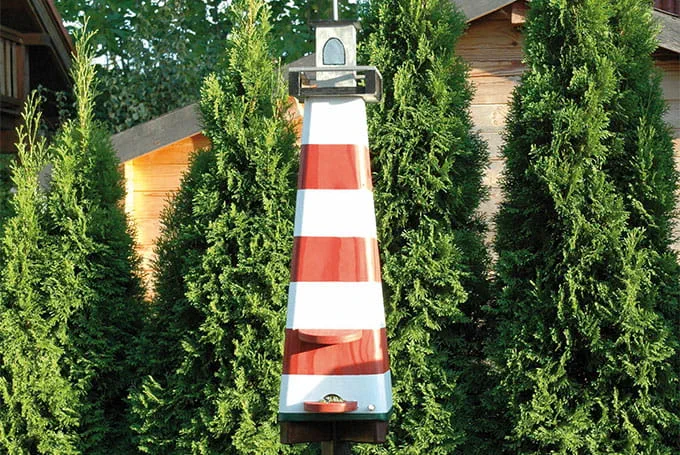
Small birdhouse
Required materials
Wooden material:
- Position 1*: 2x: Wall Length: 592; Width: 207; Thickness: 15; Plywood
- Position 2: 2x: Wall 592 x 177 x 15 Plywood
- Position 3: 1x: Base, large 208 x 208 x 15 Plywood
- Position 4: 1x: Base, small 177 x 177 x 15 Plywood
- Position 5: 1x: Semi-circle feed trough, dia. 100, Plywood
- Position 6: 1x: Canopy, dia. 120 Plywood
- Position 7: 2x: Pipe mount, side 120 x 100 x 15 Plywood
- Position 8: 2x: Pipe mount, bottom 90 x 50 x 15
- Position 9: 1x: Pipe support 80 x 38 x 15 Plywood
- Position 10: 1x: Platform, 150 x 150 x 15 Plywood
- Position 11: 1x: Steeple attachment 58 x 58 x 15 Plywood
- Position 12: 2x: Steeple wall 120 x 70 x 6 Plywood
- Position 13: 2x: Steeple wall 120 x 58 x 6 Plywood
- Position 14: 1x: Steeple roof 90 x 90 x 6 Plywood
- Position 15: 17x: SPAX Length: 35; Thickness: 3.5
- Position 16: 4x: SPAX Length: 25; Thickness: 3.5
- Position 17: 2x: SPAX Length: 16; Thickness: 3.5
- Position 18: 1x: Reducing fitting 75 x 50 Plastic
- Position 19: 1x: Pipe 250 x 50 Plastic
- Position 20: 1x: Pipe 150 x 50 Plastic
- Position 21: 1x: 30° elbow Width: 50 Plastic
All measurements in mm
* Position in drawing
Construction plan drawing
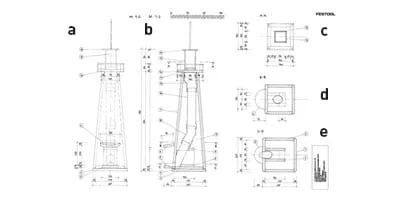
- Cross-section view, front
- Cross-section view, side
- Horizontal section A-A
- Horizontal section B-B
- Horizontal section C-C
Click the button for the true-to-size plan
Procedure
-
Step 1
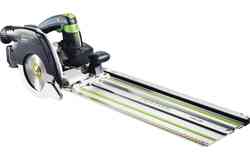
Use a hand saw with guide rail or a table saw to cut the plywood sheets to the specified sizes in the material list. When cutting using the multifunction table as shown in the image, you can angle the stop rail to 5° so that you can cut the walls of the house simply and precisely.

-
Step 2
The minimum thickness that can be used with the stop rail is 15 mm, so when working with 6 mm sheets, you must place a cutting board underneath on the table.

-
Step 3
When cutting the upper and lower edges of the walls (positions 1 and 2), angle the saw blade to 5°. It can be helpful to use a second wall piece as a stop.

-
Step 4
Glue the four wall pieces to one another. Use either a watertight wood glue or a polyurethane adhesive for glueing. You can also secure the glue joints with 3.5 x 35 SPAX or nails. The walls of the tower steeple (positions 12 and 13) should be glued in the same way.

-
Step 5
When the adhesive is dry, use coarse sandpaper (P80 grit) to sand the sides of the tower flush with one another. Cut the base panels for the tower (positions 3 and 4). The small base panel should be cut so that it fits exactly between the walls.

-
Step 6
The larger panel should sit flush with the outer edges of the tower. All edges on the base panels should be at a 5° angle.

-
Step 7
Hold the water pipe in the tower and on the lower end (position 17), mark the diagonal where the pipe should be cut. Use a hand saw or an angle grinder to make the cut. Smooth the cut with a stationary belt sander or a file.

-
Step 8
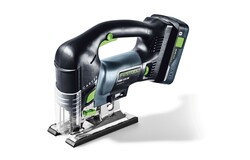
Mark the position of the feed hole onto the tower. In each of the lower corners, drill an 8 mm hole and use a jigsaw with curved saw blade to cut out the curve. Screw the individual parts of the pipe mount together.

-
Step 9
Pre-drill a 3.5 mm hole in each of the sides (position 7) to facilitate this. The individual parts (positions 7 and 8) can then be screwed to one another using 3.5 x 35 SPAX screws. Screw the mount to the small base panel. Use two 3.5 x 16 SPAX screws to screw the pipe on the side of the mount.

-
Step 10
Draw two diagonal lines on the large base panel and ensure the corners of the small base panel are exactly positioned on the lines. Screw the two base panels to one another. Now, stand the tower upright and check how easily food passes through the feed hole. If necessary, use a rasp or a jigsaw on the hole.

-
Step 11
Fit an additional support piece (position 9) on the mount behind the pipe. Cut a board at a 5° angle so that you can cut positions 5 and 6 from it. They will be used to fit a semi-circle in front of the feed hole to act as a perch and a trough for the birds and above the feed hole as a canopy to protect from the rain. The angled edge is the one that fixes to the tower.

-
Step 12
Use a Forstner drill bit (dia. 35 mm) to drill a 5 mm recess. A board with a 35 mm hole can be used as a drill guide. Draw curves onto both pieces and cut them using a jigsaw. Both pieces are screwed on from the inside of the tower.

-
Step 13
When designing the tower steeple, your imagination has no limits. Screw a wooden block to the platform which can be used when glueing the tower steeple. Use adhesive and nails to fasten corner bars which will later have railings attached to them.

-
Step 14
When your tower steeple is finished, fix it to the tower with a screw which can be used as a centre of rotation. To fill the feed pipe on the inside, simply turn the whole steeple to the side.

-
Step 15
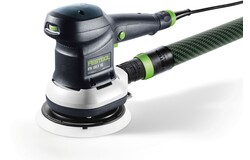
The outer corners of the tower can be rounded off with a router or a hand planer. Then sand all parts of the tower with a hand sanding block or eccentric sander.

Surface tip
