


The tree is decorated, the presents are wrapped and the house smells of Christmas cookies. Christmas is one of the most wonderful times of the year, but it would hardly be a true celebration without a nativity scene under Christmas tree!
This tutorial will take you through step-by-step instructions to build your own nativity scene. Happy building!
Nativity scene
Nativity scene for a merry Christmas

Required materials

Wooden material:
* Position in drawing
- Position 1*: 1x; Base panel length: 1000; Width: 800; Thickness: 19; MDF
- Position 2: 1x; Duplicate of 1; 2000 x 120 x 20; Spruce
- Position 3: 2x; Front/back wall 800 x 400 x 19; Spruce, laminated wood
- Position 4: 2x; Sides 310 x 250 x 19; Spruce, laminated wood
- Position 5: 40x; Roof slats 480 x 35 x 5; Spruce
- Position 6: 10x; SPAX/S screws (for 2) 3.5 x 35
- Position 7: 10x; SPAX/S screws (for 2) 3.5 x 40
- Position 8: 12x; Wooden dowel 6 x 30 Diameter 6; Beech, corrug. dowel
- Position 9: 100x; Nails for slats 1.5 x 25; Lost head nails
- Position 10: 1x; Wood glue; small bottle; Ponal
- Position 11: 1x; Artificial turf; 1100 x 900 x 2; Green felt
* Position in drawing
Construction plan drawing
Nativity scene

Download template diagram description (Scale 1:1)
____ Front wall
----- Back wall
A: Left wall
Tip: The size of the nativity scene can be reduced to be the same scale as the figures.
Power tools


Accessories

Procedure
A step-by-step guide to the nativity scene
-
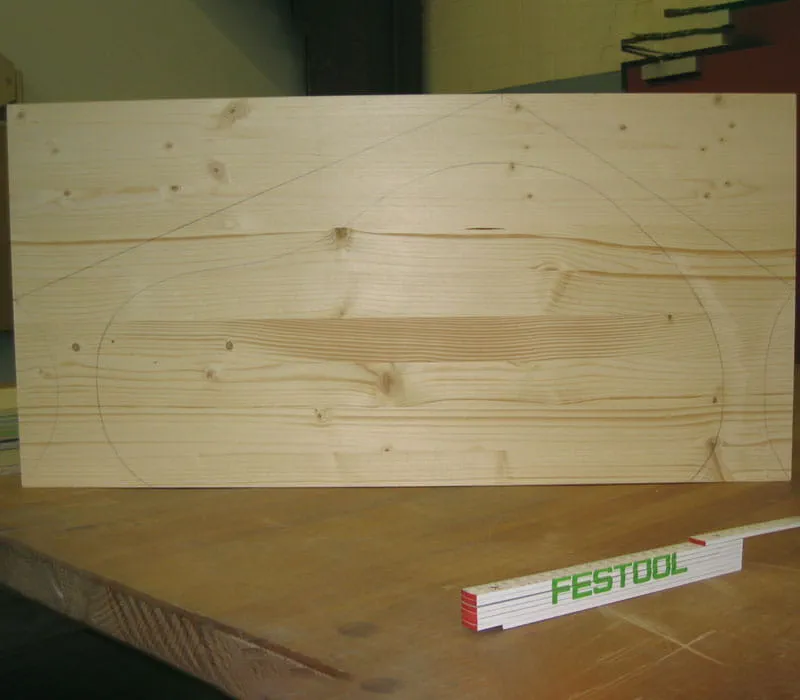
Step 1
Screw the duplicate piece underneath the base panel using 3.5 x 35 SPAX screws (position 6). Mark out the curve for the outer edge and cut.
-
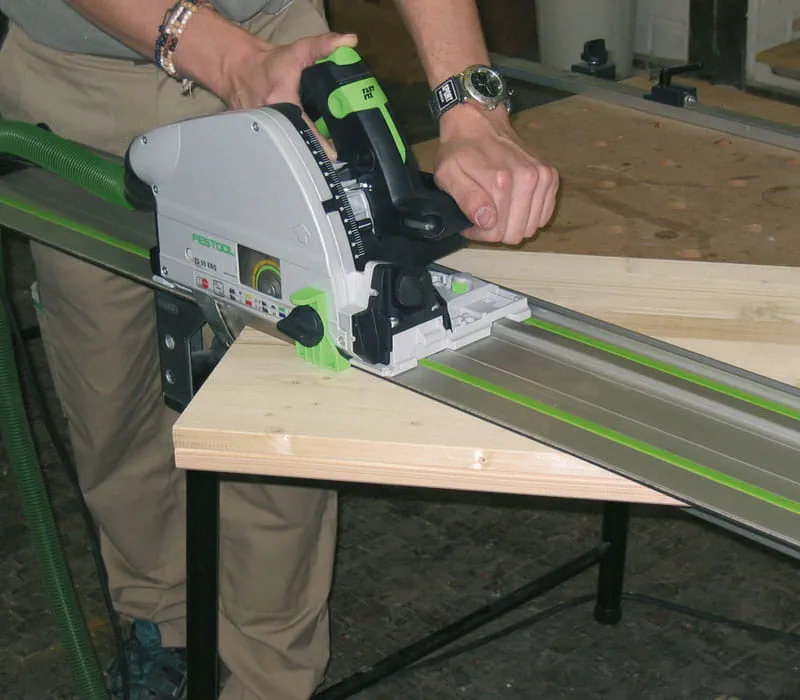
Step 2
Mark out the curve for the outer edges of the base plate, including duplicate, and the side pieces. Use a portable circular saw with guide rail or a jigsaw to cut out the straight edges.
-
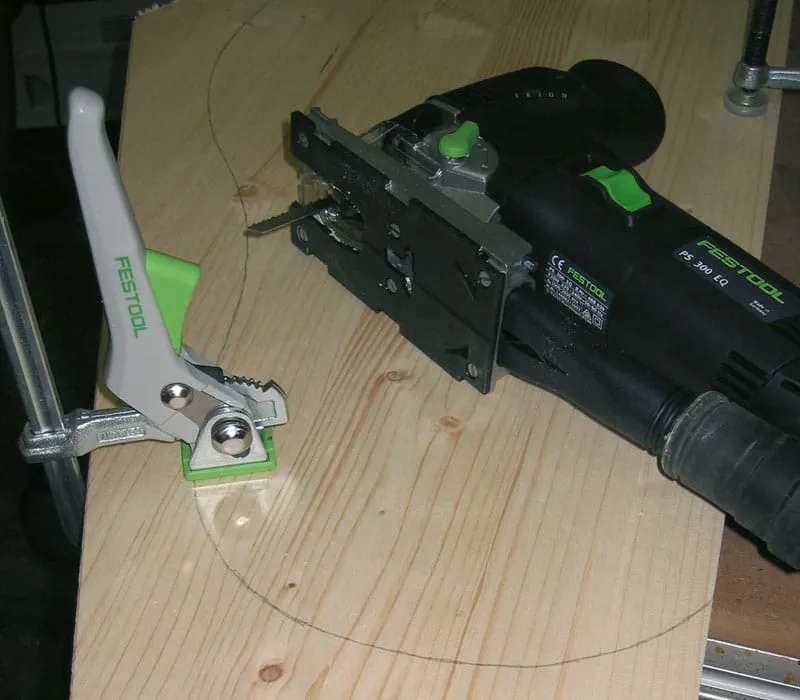
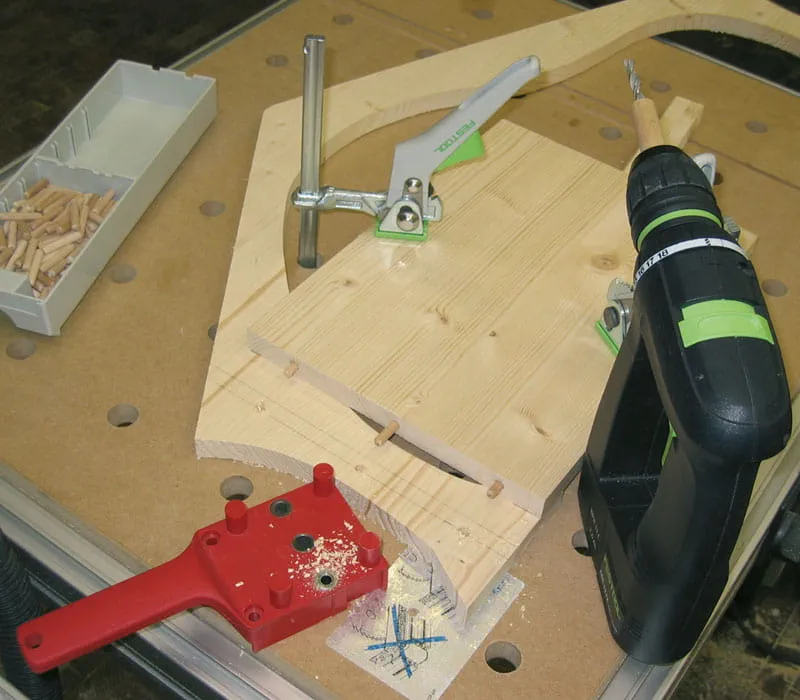
Step 3
Cut out the curved parts using a jigsaw. Drill a hole in the corner of the window (dia. 8 mm) so that you are able to cut it out.
-
Step 4
Cut the front, back and side wall pieces, line them up together and mark on them where the outer side walls will be affixed.

-
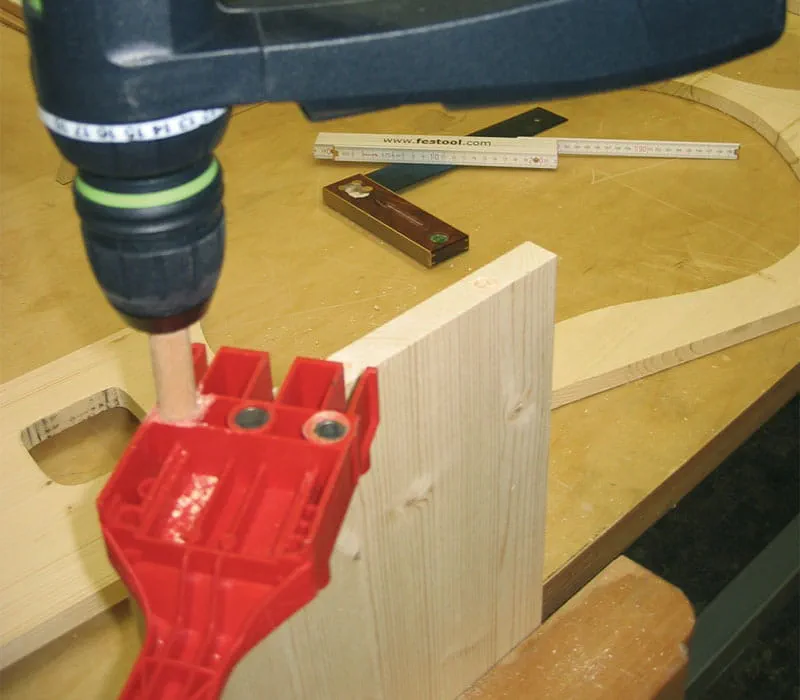
Step 5
Drill the dowel holes (dia. 6 mm) into the narrow edge of the side walls using a dowel template.
-
Step 6
Place the individual stable pieces together and transfer the dowel holes onto the centre line that was drawn earlier. Alternatively, transfer the dowel holes using dowel tips. Dowel (position 8)
-
Step 7
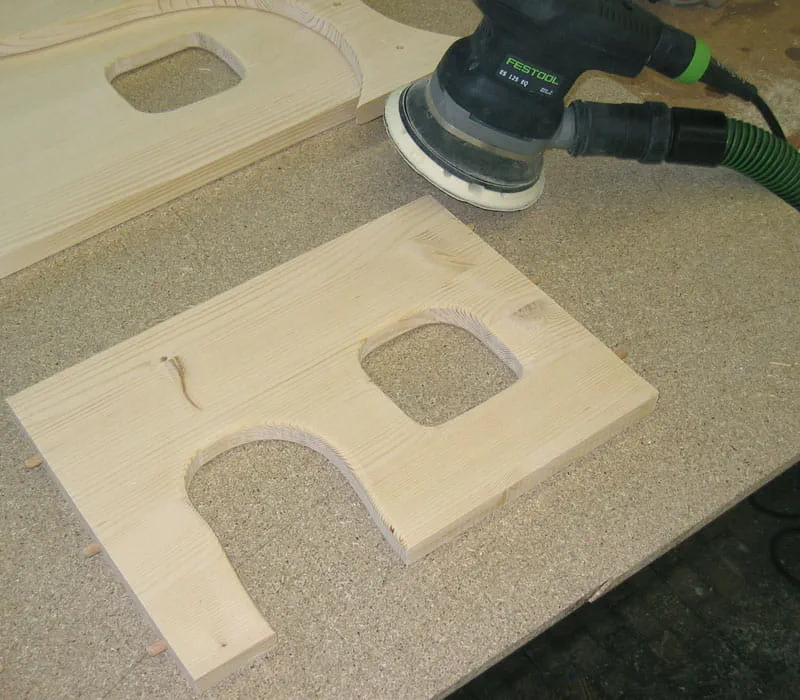
Sand each of the edges and using a router or a hand saw, cut out the rounded door and window shape. Sand the surfaces by hand or using an eccentric sander.
-
Step 8
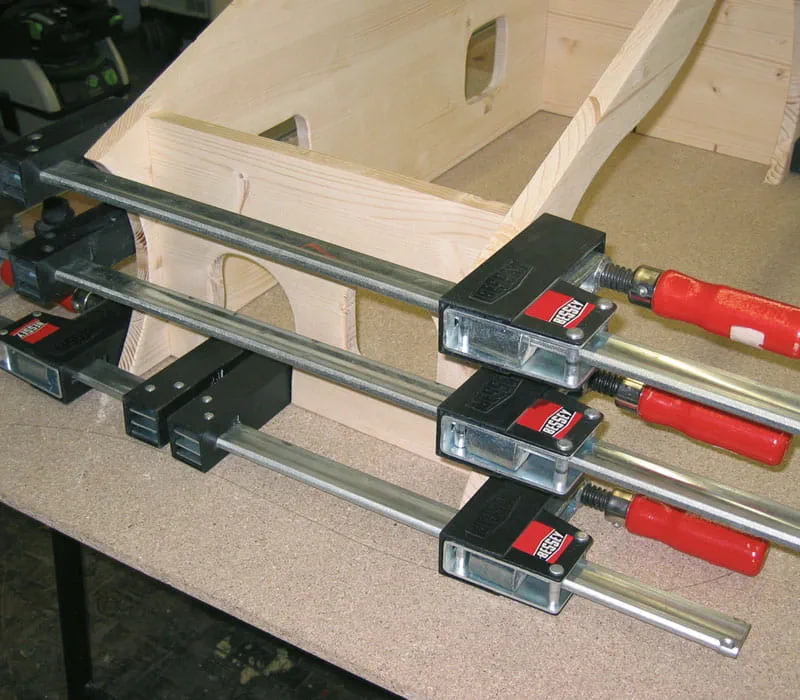
Clamp the stable pieces together using clamps and junctions or using special clamps (e.g. shell clamps). Position two clamps in the door (see photo)
-
Step 9
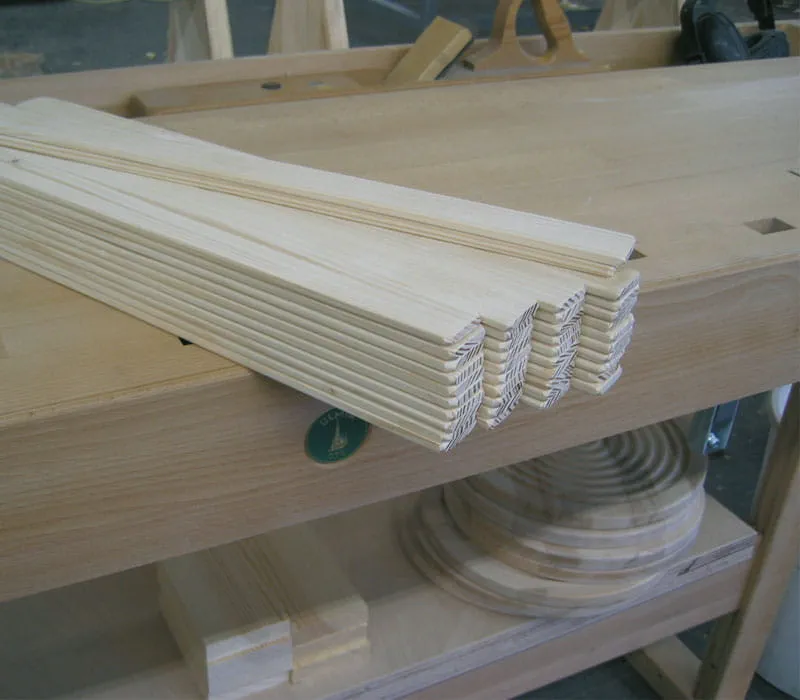
While the adhesive dries, cut the roof slats for the roof (sold by the metre in the timber trade) to the correct lengths and break the edges.
-
Step 10
Fasten down the slats using adhesive and small nails (position 9).
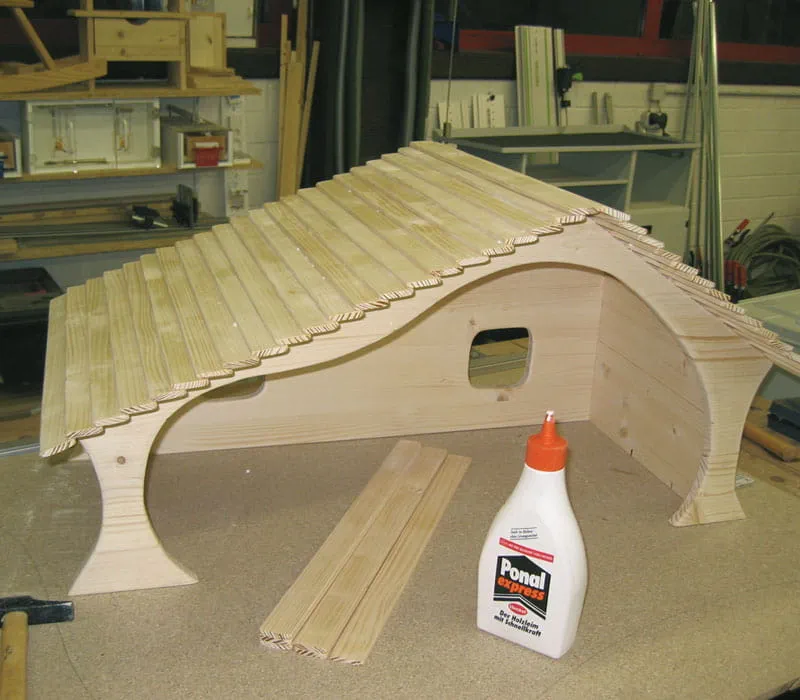
-
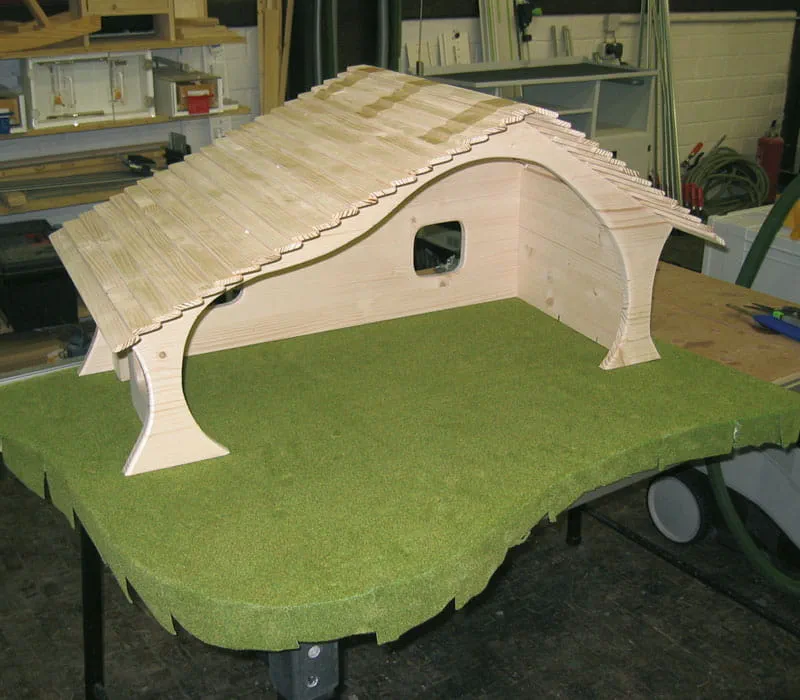
Step 11
Use a spray adhesive to glue green artificial grass or felt to the base panel of the nativity scene. Screw the stable to the base panel from underneath (position 7).
-
Step 12
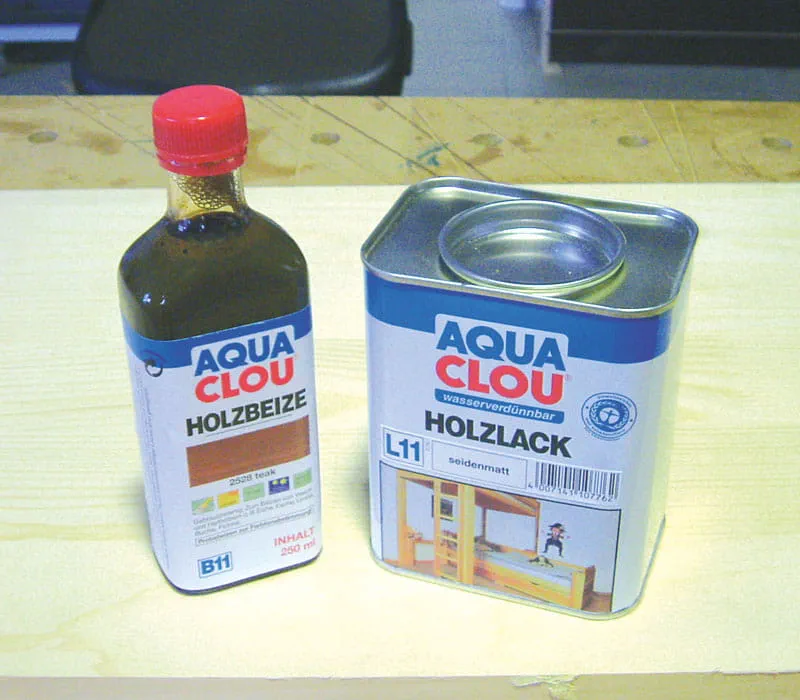
Paint the nativity scene with your desired colour of wood stain and then seal it with varnish or wax.


Download template for nativity figures
Tip for materials:
19 mm laminated alder wood or 5 mm birch plywood with additional support plates
