


Laying wooden floorboards – more refinement through laying diagonally

Description
The waste is around minimum 10% if not generally much higher, however the appearance is high-quality and professional. Crooked walls can also be well concealed.
The process of laying the floorboards is a little different here, so we have a few tips and tricks here for you. With the right tool and the right working steps, you will have a superior floor in no time at all.
Material list
- (Wooden floorboards, parquet flooring, laminate, vinyl floor)
- Hammer
- Distance wedges
- Tap block
- Pull bar
- Cleaner for adhesive
- Toothed spatula for adhesive
- Adhesive
- Knife
- Scraper blade
- Scraper
Tools/accessories


Alternative tools
The following tools and accessories are recommended as an alternative:


Preparation/set-up
-
Substrate preparation
See the Substrate preparation application guide. Test surfaces for strength, unevenness and cracks and create even surfaces. Re-sand a little if necessary.
-
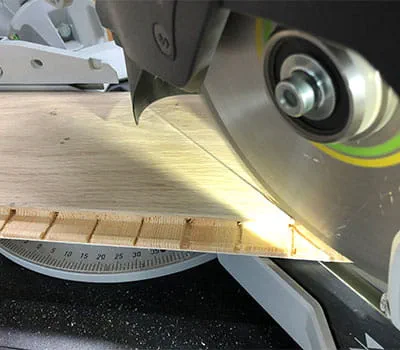
Selecting 90° inside corner
We start in one inside corner and trim a floorboard with Kapex to 45° on both sides and lay it with a little 10 mm chock as a spacer against the two walls. Now we have easy-to-measure laying and measuring points.
-
Setting Kapex to 45°
All parquet floorboards can now be cut using the 45° setting on the Kapex. The spot lighting always displays the precise step. Always pay attention to the groove and springs when cutting.


Procedure
-
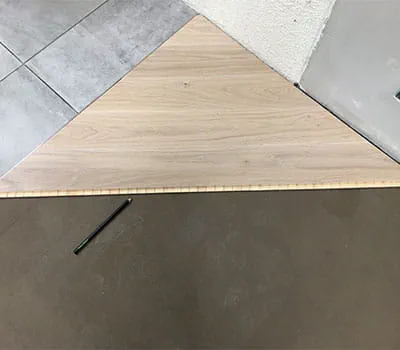
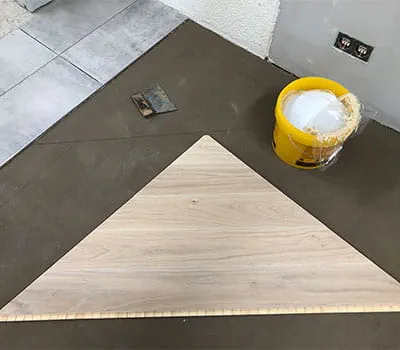
Cut a triangle for the first corner.
As we have prepared our application point through the first floorboard, we can now measure to the corner better and adapt it. All cutting within the 45° settings on the Kapex.
-
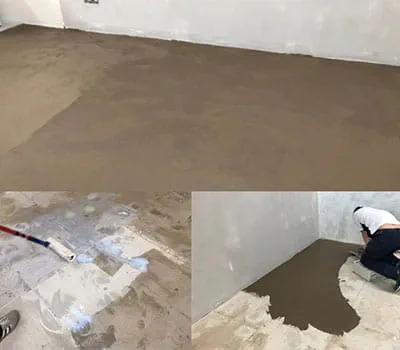
Gluing the triangle
To obtain fixed laying points, it is easier for novices laying floorboards to glue the first rows a day in advance. The adhesive surface is marked and the cut wooden floorboards are glued with the required distance to the edge.
-
Weighing down the surface
Weighing down the glued surface is extremely important and is necessary after every gluing procedure in order to prevent cavities. So do not forget. Use the adhesive bucket and the packet of parquet flooring to do this. The edges are very important. Do not forget to clean up excess adhesive properly.

-
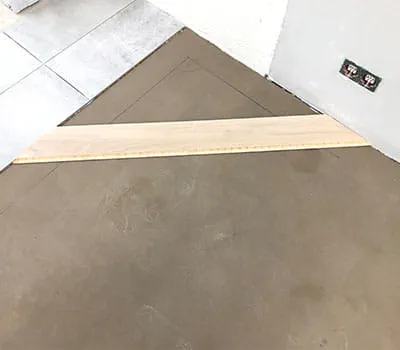
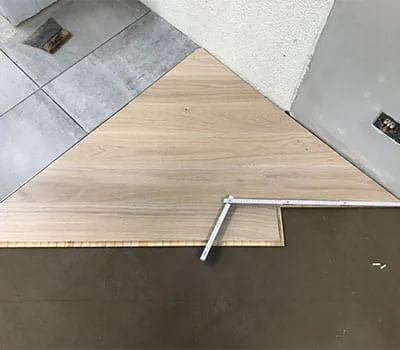
Cutting floorboards
If the adhesive has dried, depending on the size of the room and space, the parquet floorboards are cut and laid "dry" (no adhesive yet). If possible, take the sections for starting the next row.
-
Watch out for misalignment.
In this example, I have at least 30 cm offset to the next row. Of course this comes down to the length of the parquet slats proportionally. For visual effect, also make sure not to create a stair pattern on the rows following each other.

-
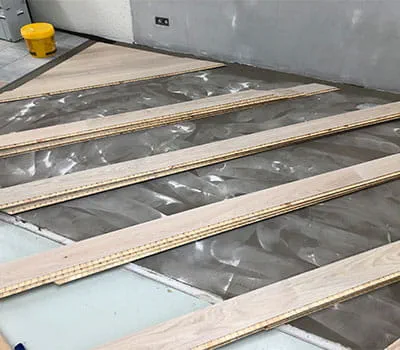
Everything is cut
When the room is completely cut, the surfaces to be glued are cleverly disassembled and marked so that you do not kneel in the adhesive well.

-
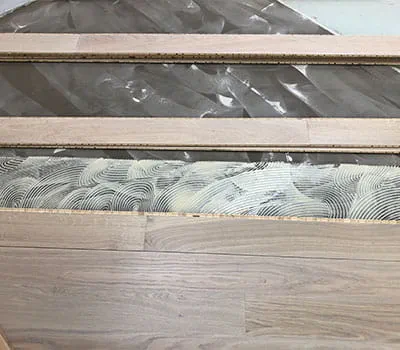
Creating adhesive surfaces
Always dismantle four rows after one another and stack each row on top of the other, as you can see in the picture.
-
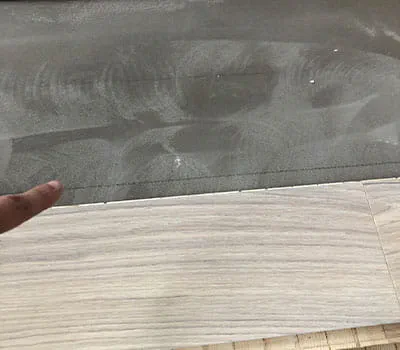
Marking the adhesive surfaces with pencil
After each fourth row, we mark the next four with a pencil line over the entire length.
-
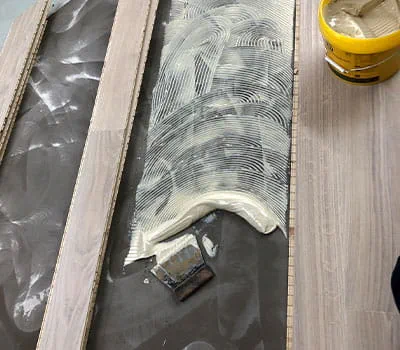
Applying the adhesive
We begin at the starting point of the triangle and draw the adhesive each time over the four rows until just before the marker.
-
Laying the wooden floorboards
To lay the floorboards, we kneel on the glued surface and lay row after row. (Glue four rows, then lay the floorboards, glue four rows, then lay the floorboards…....etc.)
-
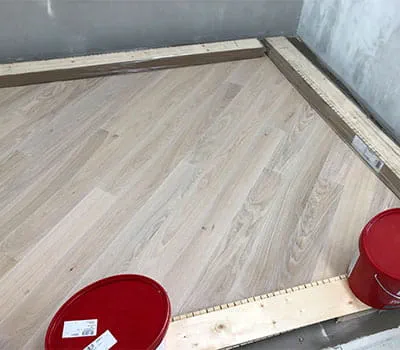
Weighing down the whole surface
When we have finished laying the floorboards, we weigh the surface down again overnight and we have a beautiful surface to show.


-
Our illustrated guides and work results are documented working steps that we have performed in practice. They are individual examples and do not guarantee or promise that users will obtain the same results. The results will depend on the user's experience and skill, as well as the material being used. Illustrated guides do not replace any Festool operating manuals and/or safety instructions. Liability for ensuring that the information, instructions and applications are free from content defects and defects of title, in particular with regard to the absence of defects, correctness, freedom from third party intellectual property rights and copyrights, completeness and fitness for purpose, is excluded. Claims for damages made by the user, regardless of their legal basis, are excluded. These liability exclusions are not applicable if the damage was intentional or caused by gross negligence, or in cases of statutory liability.
We cannot accept liability for damage resulting from defects.↑
