


Put an end to chaos in your home office
The smart, flush-fitted lid in the table creates order and flexibility thanks to the integrated storage space.
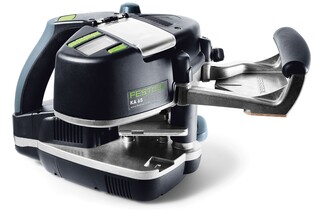
Splinter-free cutting with the plunge-cut saw.

Description
Due to the lack of space or else for decorative purposes, it can be of advantage to create a storage space that can be cleverly concealed and used relatively easily in/under the table or behind a wall. In our case, it is a table made from veneered chipboard. Here, the desired lid size must be cut on both sides so that it's splinter-free, as it's being used again right there in the form of an opening. So you get a clean look and the lid is barely apparent.
- Table/plate e.g. multiplex plate (no edging material necessary/does not have to be edged)
- Table/plate e.g. veneered chipboard (additional edging material/has to be edged)
- Plate material for storage box
- Two hinges
- Sharp mortise chisel optional
- If desired: Closure e.g. magnetic clasp or 'push to open'
- Laptop holder for extending
Tools/accessories


Alternative machines


Preparation/set-up
-
Drawing a plan
Draw a rough plan of where the lid should be placed and note the dimensions. Leave a little more space in the front area to make room for shelves, such as for the keyboard and mouse.

-
Precise dimensions of the inlays
Think of how deep the false bottom should be and of everything that should be stored in it. Take the measurements of your laptop. Now chart your cutout at an angle.

-
Fixing the plate
In our case, we're working with a veneered plate. This must be fixed so that it's elevated on the work bench, so that we don't cut into it (see figure)

-
Initial settings for a perfect cut with the plunge-cut saw
Place the guide rail on your marking. Use two lever clamps or fastening clamps to fix the guide rail to your table. Then place the plunge-cut saw with scoring function on the rail and set the guidance jaws with zero play. Set the scorer in the middle of the main saw blade, as described in the operating instructions of the saw.

-
Activation of the scorer
Two steps are required to cut out an inner surface, so that a perfect cutting result is achieved right up to the corners. This means that we score first, then we trim with the main saw blade in the second step. To do so, we first activate the scoring function at the front lever so that it's at "ON". The scorer is now activated.

-
Deactivation of main saw blade
Directly afterwards, we deactivate the main saw blade with the lever at the top of the saw by blocking it.


Procedure
-
Placing the saw for scoring
As on the main saw blade, the scorer has markings on the housing of the saw, for orientation at the beginning and end of the emerging saw blade. Place the saw so that the marking matches the marking on your table (see photo). Now score the first of the four markings with the saw. Score on sight, using the marking on the housing as an aid again. Cutting with the main saw blade then follows directly. For this, we deactivate the scorer in turn and override the blocking of the main saw blade.

-
Kickback stop optional
So as to be able to plunge in safely and precisely at the start of the cut without overlapping the marking, you can optionally position the Kickback stop on the rail so that the saw blade cuts perfectly into the marking.

-
Observing the main saw blade markings
At the full cutting depth, you can go by the markings on the housing here too, as has already been done with the scorer, in order to plunge precisely into the line.

-
Cutting with the main saw blade
Now we travel along our marking – on sight, once again. The viewing window allows a perfect view of the saw blade, so that we can easily see the end of the marking.

-
Repetition of the processes until the lid is cut with the saw
Repeat the individual steps for each marking for the cut out (from preparation/set-up (steps 5 and 6) to procedure (1–4)). You can clearly see on the figure how clean the cut out is. Absolutely splinter-free, which is a very important point for this application.

-
Preparing the jigsaw for the corners
The corners must still be cut through completely now. To prevent splinters here too, please make sure not to use a wider jigsaw blade than the circular saw blade. Pay attention to settings on the saw. Install the splinter guard and switch off the pendulum stroke.

-
Carefully sawing out the corners
We carefully feed in the jigsaw blade and complete the cut out at all corners. Then the edges and the edge bander are prepared. Please also pay attention to the operating instructions here. However, this process is only necessary if, for instance, a press board is being used as backing material. For multiplex plates, the next few steps can be skipped (continue with step 15).

-
Edging inner edges on the table and the lid with a thin edge
The two opposite sides must always be edged here and then routed on both sides, so that the edge bander can't get caught anywhere. Depending on the edge thickness, the lid may have to be trimmed a little in advance. A little tip: The front edge of the lid can be easily undercut so that it opens and closes more easily. (Step not required for multiplex)

-
Optional alternative: Using a pressed edge
If no edge bander is available, or the cut out for it is too small, pressed edges can also be used.

-
Re-cutting the protruding edges
To remove potential protrusions, provide the router with a radius router, and mill protruding edges as described. (Step not required for multiplex)

-
Carefully remove protruding corners with a sharp mortise chisel
Then remove again with the scraper with the corresponding radius.

-
Edging of all parts is now finished

-
Quick check of whether everything fits together

-
Positioning the hinges
Marking the hinges on the table and on the lid.

-
Routing the hinges
In our case, the 12-tooth router is perfectly suited to the joining machine. Alternatively, you can, of course, also use a router for this, in order to route the holes for the hinges exactly.

-
Installing hinges

-
Construction of the false bottom
Create the storage box at whatever height you want, and glue all parts together. Depending on the required closure type, ensure that the lid is supported accordingly. (see step 19)

-
Joining the bottom with the plate
We turn the table (underside upwards) and convey the box to our opening. Now join the parts by gluing or dowelling, and clamp them until the adhesive is dry.

-
Adding a closure for the false bottom
To allow you to open and close the lid without this being seen, it is, for example, equipped with a magnetic lock or with 'push to open' openers.

-
Setting up the storage compartment in the plate
Insert the laptop holder, put the computer on top of it, and you're good to go!

-
After finishing work in your home office
Store everything in the integrated compartment and close the lid.


-
Our illustrated guides and work results are documented working steps that we have performed in practice. They are individual examples and do not guarantee or promise that users will obtain the same results. The results will depend on the user's experience and skill, as well as the material being used. Illustrated guides do not replace any Festool operating manuals and/or safety instructions. Liability for ensuring that the information, instructions and applications are free from content defects and defects of title, in particular with regard to the absence of defects, correctness, freedom from third party intellectual property rights and copyrights, completeness and fitness for purpose, is excluded. Claims for damages made by the user, regardless of their legal basis, are excluded. These liability exclusions are not applicable if the damage was intentional or caused by gross negligence, or in cases of statutory liability.
We cannot accept liability for damage resulting from defects.↑
