Using a wood router to carve pictures in wood freehand
Description
Routers are easy to use for producing creative, artistic wooden surfaces. To do this, the router is guided freehand without any stops. Lines and pictures are drawn on the wooden surface either based on your own draft or using a template. The user carefully traces the lines in order to rout the pictures into the wood. This relies on the user's skill and how steady they can keep the router. The tool has to be guided with great care and very high precision. Wood with distinct rings of early and late wood require the tool to be guided particularly precisely as the cutter will try to follow the rings of hard late wood. To make the design easier to see, the wood is stained a dark colour before being routed.
First a few examples:
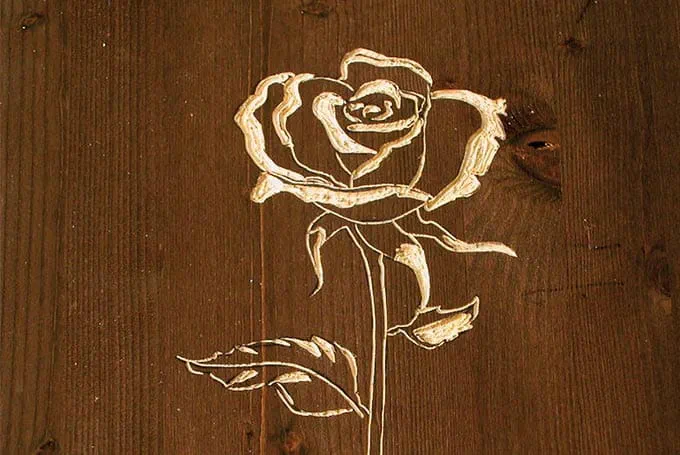
- Engraving: Plant motif cut with a script cutter. Can be used for decorations or for wood engraving.
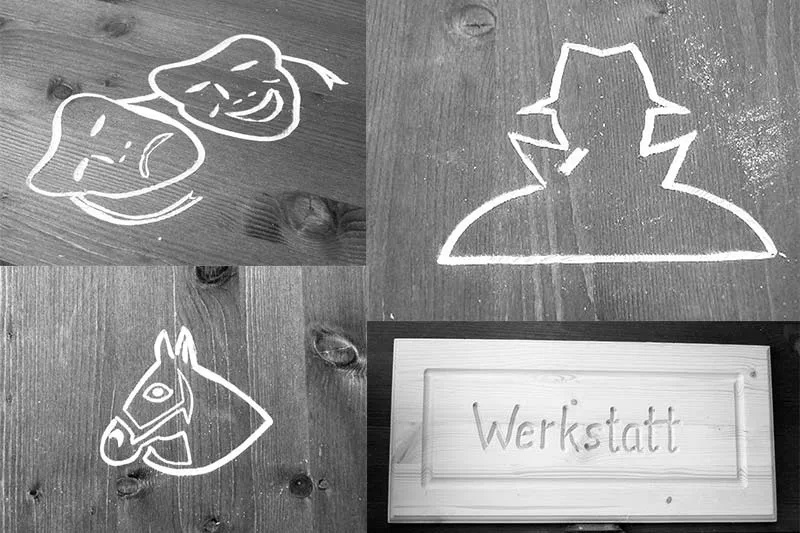
- Presentation of symbols as a decorative element
- Orientation symbol, e.g. on a toilet door in a bar
- Decorations can be used with an animal motif, e.g. for children's furniture
- Routing signs with letters
Tools/accessories
Alternative tools
- V-groove cutter
- Flute cutter
- Groove cutter with small diameter
Preparation/set-up
-
Fit the necessary cutter in the collet of the router. In our example, a script cutter is used to rout pictures or script into wood. They are available in HW or HS.

-
Trace the contour lines onto the workpiece using carbon paper so that you can then rout the picture into the wood.

Procedure
-
Use the script cutter to follow the contour lines and rout the contours in one or two work steps. Set the routing depth relatively low for the first work step; exact values cannot be specified at this point because this depends on the type of wood used. You should make a few trial cuts in advance with the same type of wood to find out by trial and error which routing depth is possible without any problems.

-
Guide the router with both hands. One hand is at the pistol grip and the heel of the other hand is on the workpiece and guides the router on the router table. This makes relatively exact guidance possible without any serious wobbling.

-
A finished contour can look like this.

-
Another option for routing according to templates involves sticking a copy of the template onto the workpiece; this means that users essentially "trace" the image with the router.

-
In this example, first cut all inner lines or elements and rout the outline of the face at the end. Otherwise the template will slip.

-
Great care must be taken when copying a flower from a template. This does not simply involve retracing a contour, but rather a ductile, three-dimensional effect should be created.

-
On the detail photo, you can see that the routing depth was changed while the flower was being cut.

-
A flute cutter allows you to achieve surfaces such as those created with a fluting carving tool.

-
Raise and lower the motor section of the router while cutting. At the same time, you can also change the feed direction when fully plunged in the material. When cutting along existing edges, always ensure that you are working in the opposite direction.

-
Experiment: A surface was "carved" with the flute cutter, then stained and then "carved" again in places. The three-dimensional effect of the pictures becomes obvious.

-
Here is extract from a relief for a nursery motif.
Engraving was carried out here with a script cutter and then carving was carried out with a small flute cutter to produce the pictures.
-
A further ductile effect can be achieved if the wood is milled around a contour.

-
In this example, a spiral groove cutter is used to rout freely cropped pictures into wood.

-
Our illustrated guides and work results are documented working steps that we have performed in practice. They are individual examples and do not guarantee or promise that users will obtain the same results. The results will depend on the user's experience and skill, as well as the material being used. Illustrated guides do not replace any Festool operating manuals and/or safety instructions. Liability for ensuring that the information, instructions and applications are free from content defects and defects of title, in particular with regard to the absence of defects, correctness, freedom from third party intellectual property rights and copyrights, completeness and fitness for purpose, is excluded. Claims for damages made by the user, regardless of their legal basis, are excluded. These liability exclusions are not applicable if the damage was intentional or caused by gross negligence, or in cases of statutory liability.
We cannot accept liability for damage resulting from defects.↑


