


Repairing cracks in screed » Instructions for crack repair

Description
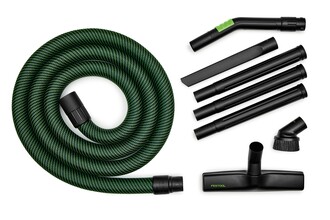
Tools/accessories


Alternative tools


Procedure
-
Mount the All-D 125 diamond disc using a two-hole wrench.
Caution: Always ensure that the battery pack is removed before changing the disc.
-
Connect the AGC DSC 125 to the mobile dust extractor. Set hose diameter to D36 and switch on AC.

-
Push the Bluetooth battery onto the AGC DSC 125, press the pairing button on the extractor and switch on the AGC DSC 125. The mobile dust extractor is now connected to the AGC DSC 125 via Bluetooth. When repairing screed cracks, the extractor now always starts automatically when the AGC DSC is started up.

-
Position the AGC DSC 125 on the crack and slowly make a plunge cut. The cutting depth for repairing a crack should be 1/2 to 2/3 of the screed thickness.
Caution: Do not cut too deep into heating screeds (i.e. a screed floor with cast-in underfloor heating), otherwise the heating pipes in the screed may be damaged.
-
Use the AGC DSC 125 to cut into the screed along the crack and cut a transverse slot for the shaft connectors every 25 cm.

-
Remove dust and loose parts from the cracks using the mobile dust extractor to avoid adhesion problems with the resin.

-
If the joints are split, free and clean, the next step to repair the cracks is to place the connectors in the transverse joints.

-
Pour crack resin into the joint until it is completely filled with the resin.

-
For better bonding of the fillers or adhesives to be applied, sprinkle quartz sand (grit 0.4–0.8 mm) into the cast resin while it is still fresh.

-
After the resin has hardened, the excess sand can be removed with the mobile dust extractor. The ground is now considered to be free of cracks and can be worked on further after repair.


-
Our illustrated guides and work results are documented working steps that we have performed in practice. They are individual examples and do not guarantee or promise that users will obtain the same results. The results will depend on the user's experience and skill, as well as the material being used. Illustrated guides do not replace any Festool operating manuals and/or safety instructions. Liability for ensuring that the information, instructions and applications are free from content defects and defects of title, in particular with regard to the absence of defects, correctness, freedom from third party intellectual property rights and copyrights, completeness and fitness for purpose, is excluded. Claims for damages made by the user, regardless of their legal basis, are excluded. These liability exclusions are not applicable if the damage was intentional or caused by gross negligence, or in cases of statutory liability.
We cannot accept liability for damage resulting from defects.↑
