


Join butted wooden panel joints with DOMINO

Description
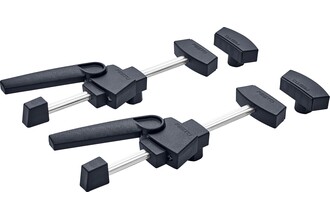
Tools/accessories


Alternative tools

Preparation/set-up
-
With larger workpiece widths and wider hole spacing, the cross stop can be used when joining wooden panels together to work easily with
the pin stop system instead of marking out holes.
Tip:
The cross stop can be used both for the DF 500 and the DF 700, and allows for larger hole distances than can be achieved with the rocker stop system. Ensure that the stop is fitted onto the tool that is being used.
-
To fit the cross stop on the tool in question, turn the clamp jaw on the stop pin so that it is set to the DF 500 or DF 700 position (each tool is marked accordingly on the front of the pin).

-
Mount the cross stop onto the joining machine according to the operating instructions. In this example, we are processing 6 × 40 mm dowels.

-
Due to the material thickness of 19 mm, the dowel cannot be inserted into both workpiece parts (front and surface) with 20 mm on each side. For this reason, a routed hole with a depth of 25 mm is created (on the front side) for this butted joint. The other routed hole (on the surface) is 15 mm deep, so that the total domino length of 40 mm is processed. Set the corresponding routing depth on the tool.


Procedure
-
Place the joining machine at the front edge of the workpiece with the stop pin for the first routed hole, and route the hole with the appropriate hole width.

-
For the other routed holes, set the desired hole distance on the cross stop and position the pin in the first routed hole. Route the other holes as slots.

-
Use the same process to create the routed holes for the side wall of the cabinet. Position the first hole with the stop pin of the DOMINO joining machine.

-
Position the other holes using the pins on the cross stop. Using the additional stop, along with the cross stop – is beneficial here, because the joining machine has a sturdy support surface on the panel.

-
Then create the routed holes for the shelves (this process is similar for carcass sides, etc.).
Place both side parts on top of each other and mark out the position where the centre shelf will be. Mark the top and bottom edge of the shelf (material thickness), not the centre.
-
Place the top side part to one side. Position the centre shelf at the marked point and fold it over towards the right or left, so that the top or bottom edge of the centre shelf is aligned with the corresponding marking. Clamp both workpieces (centre shelf and side part).

-
In our example, the centre shelf and side part are flush at the front and are clamped accordingly. Adjust the angle of the joining machine to 0° and the routing depth to 15 mm. Then route the first domino hole with the narrow hole width using the stop pin in the horizontal side part.

-
For the other domino holes, switch the hole width to the slot and mark out the domino positions with a simple scribe mark on the horizontal centre shelf. Now place the joining machine on the scribe mark. When doing so, use the markings on the bottom of the joining machine by positioning the centre marking on the machine at the scribe mark on the shelf.

-
Switch the routing depth to 25 mm and route the domino holes in the centre shelf, again using the stop pin for the first routed hole (narrow hole width).

-
Set the other holes using the scale in the viewing window, which you align with the scribe marks. Set all holes with the narrow hole width here in the panel edge – the dowel will be glued here first and will then fit in precisely.

-
Proceed likewise for the second side part. Then insert the domino in the routed holes and join your workpiece together, applying glue to the joint. This enables you to very easily create stable joints between all types of wooden panels.


-
Our illustrated guides and work results are documented working steps that we have performed in practice. They are individual examples and do not guarantee or promise that users will obtain the same results. The results will depend on the user's experience and skill, as well as the material being used. Illustrated guides do not replace any Festool operating manuals and/or safety instructions. Liability for ensuring that the information, instructions and applications are free from content defects and defects of title, in particular with regard to the absence of defects, correctness, freedom from third party intellectual property rights and copyrights, completeness and fitness for purpose, is excluded. Claims for damages made by the user, regardless of their legal basis, are excluded. These liability exclusions are not applicable if the damage was intentional or caused by gross negligence, or in cases of statutory liability.
We cannot accept liability for damage resulting from defects.↑
