In this application example, the creation of a post end with a double beam construction is shown.
Double beam constructions with lap joints on the post provide a stable connection which is used, for example, to build a carport.

Material list
Pull the post ends apart. The depth of the lap joint in this example is 25 mm. The post end's section should be below the upper edge of the beams (here -0.5 cm) due to possible wood shrinkage.

Cut off the post ends using the cross cutting guide rail and the HK 85. The cross-cutting must be carried out in two steps.

Turn the post over and make a second cut. With the cross cutting guide rail you can achieve a very good result quickly, even when cutting thicker woods.

A hole (14 mm) for a bolt connection should be made for this connection.

The Festool drill stand for carpentry can be used in conjunction with a cordless drill or a mains-powered machine to drill bore holes quickly and straight.

The drilling depth can be adjusted on the carpentry drill stand using the depth limiters on the guide rod.

The axis markings on the drill stand base make it easier to align the drill stand.

It is recommended to adjust the parallel side fences for series drilling. The required distance from the fence side can be read off at the axle mark pointer and fixed accordingly.

Drilling holes

The HK 85 is equipped with an adjustable groove cutter to produce the lap joints

Set the desired routing depth. Checking the scribe mark is recommended. The maximum routing depth with the rail is approx. 32 mm

Carry out the routing several times in order to create the lap joint.
Tip: To prevent the wood from splintering during the final routing process, it is recommended to cut the wood fibres at the marking with a chisel.

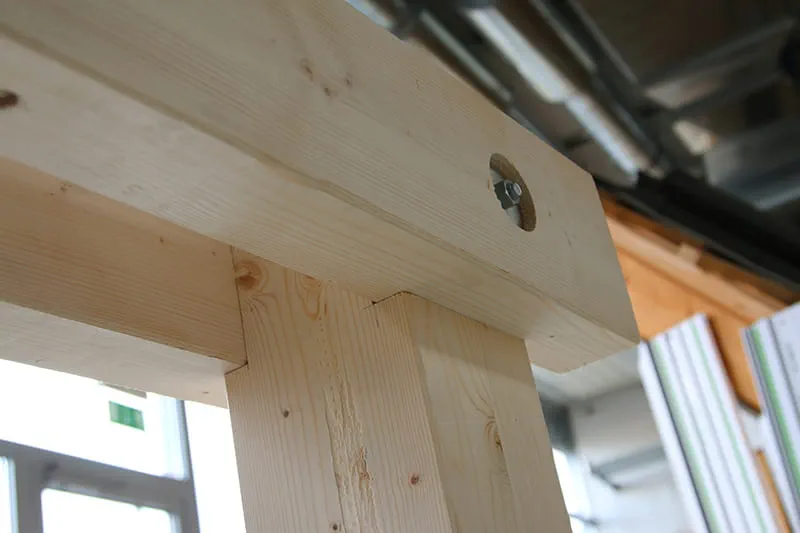
Completed post end

Fit the prepared beams with the appropriate bore holes.

After installation, unsightly areas that should be sanded often stand out on the wooden construction. The cordless eccentric sander is ideal for removing minor dirt and pencil marks afterwards.

Our illustrated guides and work results are documented working steps that we have performed in practice. They are individual examples and do not guarantee or promise that users will obtain the same results. The results will depend on the user's experience and skill, as well as the material being used. Illustrated guides do not replace any Festool operating manuals and/or safety instructions. Liability for ensuring that the information, instructions and applications are free from content defects and defects of title, in particular with regard to the absence of defects, correctness, freedom from third party intellectual property rights and copyrights, completeness and fitness for purpose, is excluded. Claims for damages made by the user, regardless of their legal basis, are excluded. These liability exclusions are not applicable if the damage was intentional or caused by gross negligence, or in cases of statutory liability.
We cannot accept liability for damage resulting from defects.↑