


This application example shows how you can build your own saddled staircase. Furthermore, a Festool portable circular saw is used in conjunction with the cross cutting guide rail system to cut out the stair stringers.
Building your own saddled staircase in the garden area

Description
For example, a wooden staircase is ideal for bridging smaller height differences in the patio area. For this purpose, the simplest staircase design is the saddled wooden staircase. Here, the steps are laid on the cut stair stringers. This application example shows which steps are necessary for a saddled staircase.
Material list
- Floorboard material for the stair stringers e.g. Douglas fir 50 mm
- Patio flooring
- Patio screws
- Possible spacers
Tools/accessories
The following tools and accessories are recommended in this application example:


Alternative tools
The following tools and accessories are recommended as an alternative:


Preparation/set-up
-
Is the correct saw blade fitted?
Several sawing applications are necessary to build a saddled staircase yourself. A rip cut saw blade should be used for these.


Procedure
-
Sawing and cutting a floorboard to length
For manufacturing the stair stringers required for the saddled wooden staircase, two floorboard pieces with a width of more than 25 cm are required.
Cutting is done with the HKC 55 portable circular saw in conjunction with the guide rail.
Do not forget to set the cutting depth!
-
Marking the stair stringer
In order to build the saddled wooden staircase yourself, draw the baseline parallel to the lower edge at a distance of 10 cm first.
Subsequently, the steps are sketched in. For this purpose, a triangle-shaped staircase is used on which the risers (S) and tread width (A) are marked. Both are dependent on the height difference to be overcome and the staircase base length. In order to obtain a wooden staircase that is easy to walk on, the step dimension formula is used (2 x S + A = 65 cm)
By positioning the two markings on the baseline, you can mark one step after the other.
The tread width should also be selected depending on the covering. Note: Scribe line = lower edge of the covering. The covering thickness for the lower and upper connection must be taken into account.
-
Finished marked stair stringer
The lower and upper stringer connections result from the location's specifications.
In this example, the staircase should rest on a concrete foundation and be fitted to a beam at the top using metal brackets.
Tip: A test elevation should be made for the construction of a saddled staircase.
-
Sawing out the steps
Carry out work on the lower sections with the HKC 55 and the fitted cross cutting guide rail.

-
Sawing out lower sections with the HKC 55 and the fitted cross cutting guide rail
First, line up with the gradient line and cut all the way into the corners.

-
Tip: For faster positioning, the variable stop on the cross cutting guide rail can be adjusted to the brackets. Allow for approx. 34° here.

-
In order to perform the horizontal cut, the right cutting edge must be positioned.

-
Tip: Read the right cutting edge on the gauge marker.

-
Saw out the corners with the jigsaw.

-
Surface treatment
The surface is now finished with RO 150 Rotex.
Carry out the coarse sanding first and then the fine sanding.
-
Tip: Use a protector to protect the sanding pad.

-
Routing edges
The OFK 500 laminate trimmer, in conjunction with the 45° chamfer cutter, is suitable for chamfering the edges.

-
Finished stair stringer

-
Cutting floorboards to size
Cutting with the HKC 55 and cross cutting guide rail.

-
Cutting floorboards to size
Recurring cuts can also be made comfortably with the KS 60 compound mitre saw in conjunction with the trimming attachments.

-
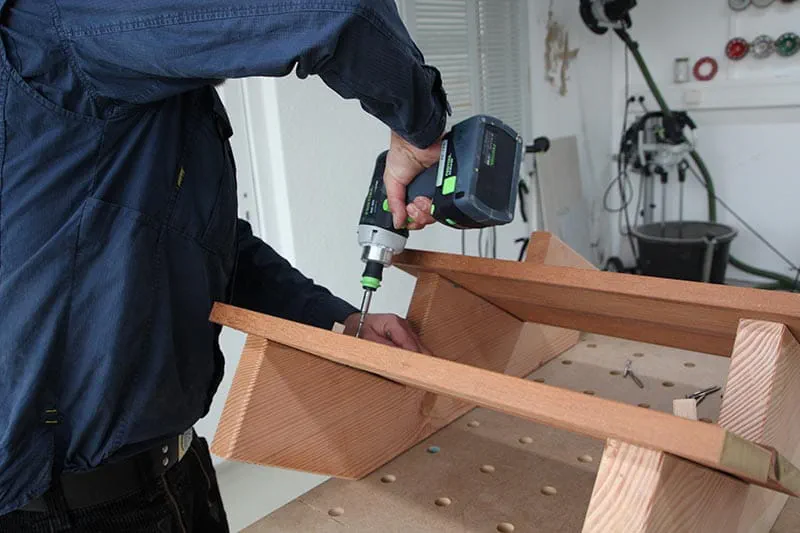
Pre-drilling and countersinking floorboards

-
Rounding off the cutting edges
Use the OFK 500 with roundover cutter and dust extraction to round off edges after construction.

-
Fit the covering with suitable screws. The covering should be installed with spacers outdoors. After building the staircase yourself, a barrier layer (bituminous sheeting) on the invisible stringer cut edges increases the outdoor wooden staircase's durability. Final fitting using suitable attachments (e.g. brackets).


-
Our illustrated guides and work results are documented working steps that we have performed in practice. They are individual examples and do not guarantee or promise that users will obtain the same results. The results will depend on the user's experience and skill, as well as the material being used. Illustrated guides do not replace any Festool operating manuals and/or safety instructions. Liability for ensuring that the information, instructions and applications are free from content defects and defects of title, in particular with regard to the absence of defects, correctness, freedom from third party intellectual property rights and copyrights, completeness and fitness for purpose, is excluded. Claims for damages made by the user, regardless of their legal basis, are excluded. These liability exclusions are not applicable if the damage was intentional or caused by gross negligence, or in cases of statutory liability.
We cannot accept liability for damage resulting from defects.↑
